Mast & Mast Step Issues
The mast and rigging have some standard issues. The boats were originally built with an aluminum mast step. Over the years, salt and rain water gets in through fittings and begins a corrosion process at the step. This leads to a "welding" of the mast to the step if the mast is left in the boat for a number of years. Many boats have had the step rebuilt with tough plastics, and sometimes the bottom inch or two is also removed from the mast in the process. A number of boats are having their masts repainted which is an excellent time to have this done if it’s not been done before. Here are a number of opinions, stories and pictures:
Ken and Francie Bushee (Release) filed this update 4/20/08:
Hi folks,
Thank you for all of the emails. Rather than email each of you , I am sending another and will hope to adress your answers. Release is a 1983 Islander 36 with internal halyards. The mast step and plate set on some crossmembers, and kind of boxed in. There is a drain hole with wires running through beneath the maststrp at the bottom of the crossmembers. I don't know if it is hollow under the step or not. There is also a small axcess hole just up from the base of the mast, which I may enlarge to get my mit in. Does anyone know if it is hollow below the mast step and steel plate? We are on a fresh water lake, so the only water in the bilge will be fresh unless we head south. Please find pictures included.
Thanks,
Ken, Francie and Skipper Bushee
kenandfrancie1@vermontel.net
Release
![[Click to enlarge]](mast-r-001-t.jpg)
Mast step drainage 1 |
![[Click to enlarge]](mast-r-002-t.jpg)
Mast step drainage 2 |
![[Click to enlarge]](mast-r-003-t.jpg)
Mast step drainage 3 |
Charles Hodgkins, 4/4/08
Well we've just finished spending the budget (and then some) on Mischief at Svendsens. They ground out the crack on the rudder and patched it so I think it's OK for now.
However, as part of the work, I had them inspect the bottom of the mast. They found corrosion and some 'belling' at the bottom. They proposed pulling the mast, cutting of some of the bottom and re-building the mast step in phenolic (sp?). Since we were considering redoing the rigging as well as LPUing it, we decided to wait until next year (and keep our fingers crossed!) so that we can save up the money to do a complete job which will cost about $8-9K.
One of the members of our yacht club suggested that since the mast was original that we consider replacing it with a new one. Ballenger says that a complete mast for an Islander 36 would be about $9K plus rigging which is not all that different to what we would spend to just cut the original mast down and rebuild the step.
So my question is: Should I replace the mast or just fix the problem (for now) given that the boat is 26 years old?
Charles Hodgkins
Mischief
Barry Stompe, 4/6/08
Charles,
We were racing in a windy Tuesday night series when we noticed the stays were all very sloppy going downwind. I suspected it was the mast base, so, we dropped out of the race and motored home. Upon inspection it was confirmed the dissimilar metals had corroded the bottom of the mast.
We were on a very tight budget at the time so I did most of the work myself. First, I removed the mainsail and boom. Then took the boat to Anderson's and loosened the turnbuckles on the stays to minimize yard labor. The yard pulled the rig, cut about 1-1/2" off the bottom, and made a phenolic base. While the rig was out I changed the shives, pulled out electrical wire, attached a pvc wire conduit with rivets up front inside of the mast, ran new wires, changed light bulbs, installed new vhf antenna, and sanded spot primed and painted some bad areas on the mast.
When the mast was out I noticed the deck was a little delaminated where the mast went through. I drew up a template for the yard to make a two piece collar out of aluminum that would through bolt from the deck to the cabin top. I gooped up the collar and delaminating area and tightened up the collar. This strengthened up the thru deck, gave a nice place to add a flange for the bottom of the mast boot, and the cabin top collar held up the headliner.
My standing rigging was still ok so we dropped the rig back in. I had JP Rigging tune the rig (which was the most raked back in the fleet). The total was $2607 in 2001. We pulled it on a Friday and I worked on it all weekend and two evenings after work. Everything was fine after that. Don't forget to put a weep hole at the bottom of the mast in a spot that is easy to inspect and cleanout (I put mine facing the head area in the cabinet).
That's my story with Tom Cat. Looking forward to seeing our I-36 friends out on the water.
Good luck,
Barry Stompe
Ron Damsen, 4/7/08
Charles,
I had the same problem with Woodbine and went ahead and had it fixed at Svendsens.
Pictures of the repair are below.
It wasn't as big a deal as I expected and went smoothly. We also replaced the rigging, added a spinnaker halyard, changed the main halyard from wire to rope, added two rope clutches, replaced the lifelines and had the bottom done. The total yard bill was $8637. That was in June, 2004.
I would guess the repair will be way cheaper than replacing the mast.
Ron Damsen
Woodbine
Rick Van Mell, 4/7/08
I agree with Ron's comments.
You might be able to save yourself a Boat Buck ($1k) if you offer to take the sails & boom off and secure all the halyards to the mast free from the deck. The labor hours to take off and put on the sails and the rest of the rigging is probably two-thirds of the hours needed to unstep and restep the mast.
Rick
Vanishing Animal
Mike Reed (Islander) filed this update 2/3/08:
A couple of years ago I pulled the mast from my I36 to deal with the mast base and mast step that were in bad shape. To make the story short, I cut 1/4 inch off of the mast and repainted it with an epoxy paint. At the the same time I built a reinforced mast step out of High Density Polyethelyne (HDPE) which fit over, into and around the old LeFeil mast step. I couldn't be happier with the fix as there is no sign of any deteriation to date.
While working on the mast, I decided to make the halyards internal. Much to my surprise when getting the mast down, I found foam rubber blocking my efforts to snake wire and halyards through the mast. Evidentually, the foam had been strung on cord and pulled through the mast to keep the wires from slapping. After removing the foam, I tired all my wires together with large sized wire ties rotateing them as I went. I did not snip off the ends before pulling the wires through. This "wire ceipede" has done an excellent job of quieting the inner sounds of the mast and believe me, we've rolled a lot at several open roadsteds without any slapping.
Small lo-res photos are attached of this project in respect to those who are still "Land Liners". If anyone would like the hires versions and/or a more detailed description of this adventure please let me know. Please let me know soon as I will be away from my computer for the better part of February.
![[Click to enlarge]](masta-001-t.jpg)
Old Mast Step |
![[Click to enlarge]](masta-002-t.jpg)
HDPE Base |
![[Click to enlarge]](masta-003-t.jpg)
Beefed Maststep |
![[Click to enlarge]](masta-004-t.jpg)
Mast Base |
![[Click to enlarge]](masta-005-t.jpg)
Wire tie Centipede |
Cheers,
Mike Reed, nwislander@comcast.net
Islander
Bellingham, WA
Ron Damsen (Woodbine) filed this report 6/20/04:
I have attached pictures showing the start to finish repair of mast
corrosion at the mast step. The repair was done at Svendsen's (Alameda)
in June, 2004. The cost of the repair was as follows:
$155 Unstep
520 Repair Mast Step
555 Step+Tune+Mast Boot
____________________
$1230 Total (Note that if you are doing rig replacement or painting, the mast step component is only $520.)
The corrosion at the base of the mast was worse on the port side for whatever reason.
When the mast was removed, the old mast step was covered with powder from the corrosion of the inside of the mast. It appeared as though water would build up inside the mast. The rigger suggested that the grounding wire attached to the mast may do more harm than good. Also, a drain hole might be helpful. If, however, there is a large buildup of powder inside the mast, a drain hole might soon get clogged.
They cut 2 inches off the bottom of the mast. They also had to cut a similar length off the inside PVC pipe that is a conduit for the electrical wires. It is not easy to make that cut up inside the mast without cutting the wires.
The new mast step was built out of phenolic. Two pieces of phenolic, 1 inch thick each, replaced the 2 inches that were removed. A third piece, cut to the inside diameter of the mast, was bolted on top to keep the mast in place.
This was a repair that I was dreading, but feel good that it is done. I also replaced the standing rigging. I have reason to believe it was original wire. I don't want to be sailing in extreme conditions with components that are beyond their useful life.
I hope this will be informative.
Ron
![[Click to enlarge]](mast-01-t.jpg)
Original Maststep Corrision |
![[Click to enlarge]](mast-02-t.jpg)
Typical butt appearance |
![[Click to enlarge]](mast-03-t.jpg)
Maststep eaten up |
![[Click to enlarge]](mast-04-t.jpg)
Old step cleaned up |
![[Click to enlarge]](mast-05-t.jpg)
New maststep |
![[Click to enlarge]](mast-06-t.jpg)
Restepped & looking good |
Warren Stansbury of Taboo wrote in (1/26/03),
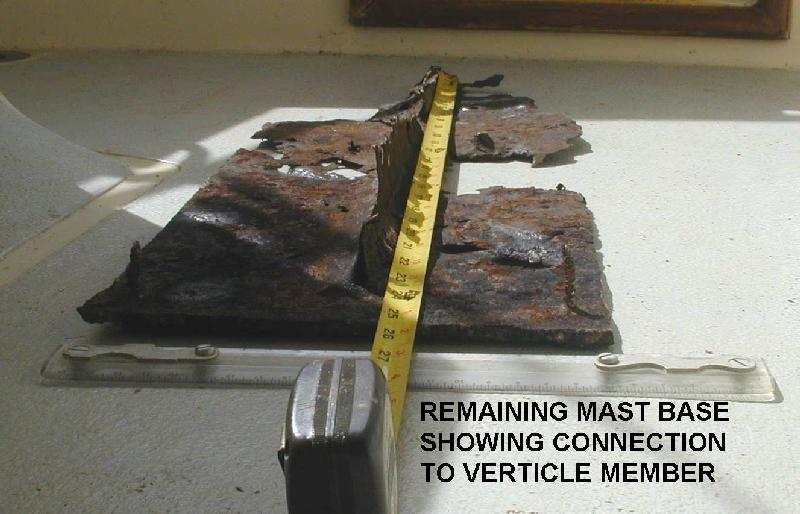
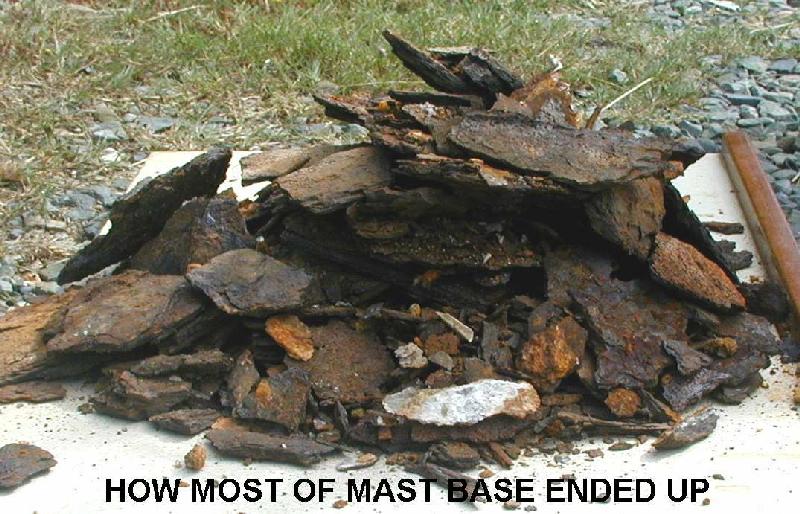
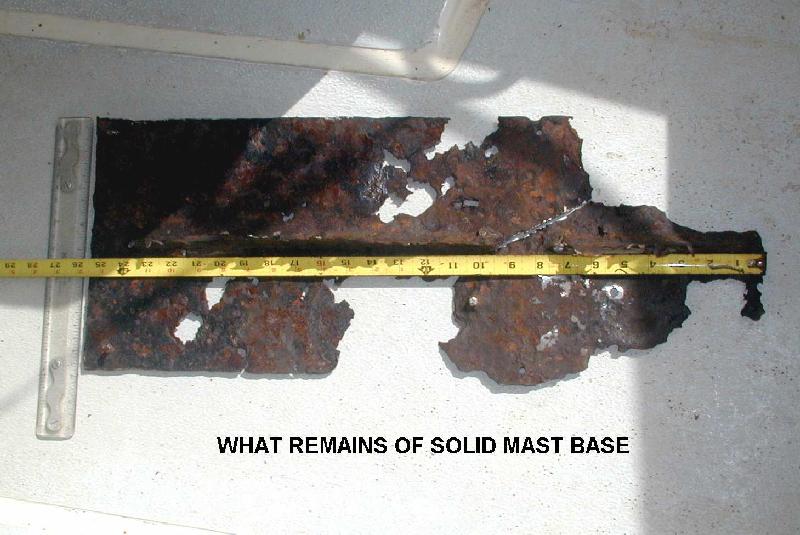
I have pulled the mast and dug into the area that was once the base. I thought you might be interested in what I found. The base appears to have been iron or steel, but was too far gone to be sure.
I was able to get enough out in one piece to figure some rough dimensions, but ultimately weight distribution and access will set my limits there. Everything I found was pretty much what I expected except the iron runner imbedded in the floor. There is a material that appears to be some kind of poured epoxy or hard plastic filling up the space between the stringers so I can't tell where it goes, but the mast base appears to have been welded to it (figure out how they did that!).
So I am reqrouping for phase two, ordering wood-epoxy and liquid wood, sheet G-10 and a Delrin-AF cap. I am considering a freind's suggestion to drill through the crown and make my halyards internal.
I have attached 3 pictures of the debris for your interest - maybe I'll even get some of the project as the new step goes in.
Warren Stansbury warren_stansbury@yahoo.com
![[Click to enlarge]](masta-001.jpg)
![[Click to enlarge]](masta-002.jpg)
![[Click to enlarge]](masta-003.jpg)
![[Click to enlarge]](masta-004.jpg)
![[Click to enlarge]](masta-005.jpg)
![[Click to enlarge]](mast-01.jpg)
![[Click to enlarge]](mast-02.jpg)
![[Click to enlarge]](mast-03.jpg)
![[Click to enlarge]](mast-04.jpg)
![[Click to enlarge]](mast-05.jpg)
![[Click to enlarge]](mast-06.jpg)